Wednesday 28 August 2013

Shabby Chic Bunting ~ From Paper!

So my craft space is shoved into a corner of the bedroom, which is only a tiny space at the best of times, with a craft desk in there it's pretty tight. But I'll take what I can get, to be honest, the bedroom was the only place in this shoebox that would accommodate anything more so in the desk went!

Did you see my post yesterday? What you see is what you get really, the desk is all I have to put my craft stuff in, so yeah, it's not much space, but we do with what we have and so it is enough.

To be honest, the photo makes it look bigger than what it actually is.

Tell a lie, I have appropriated half of the windowsill for extraneous bits and pieces, however DB is not happy and says that it's blocking the light, I beg to differ as there isn't any light coming through the porthole sized window as it is!

Anyway, moving swiftly on, or I could rant about this all bloody day... I have decided to personalise my craft space a bit more, no doubt DB will have a field day complaining in his own special way about all of the 'stuff' everywhere... Hypocrite.

Here is the video of me making the bunting/banner/thingy so yeah, please watch. I will say that it's pretty strictly edited and badly at that, I had to make it before I left for work, so no time for special effects and so forth.


Tuesday 27 August 2013

After the Crafts

Just thought I'd share a snapshot of what my desk looks like after I have finished my crafting...
It's not as bad as you might think because I do tidy up as I go. The house isn't very big... it's like living on a narrow boat on the canal. Being tidy is essential if you want to get around!
The video of this crafting season will be up in a couple of days so keep your eyes open for that one, it's not another art journaling one more of a DIY craft but it's easy, cheap and quite good fun to do!

Monday 19 August 2013

Hand lettered Typography Layout Tutorial.

 Uncomplicated straightforward method of drawing your own hand lettered typography. Save money on stamps and ink... do your own alphas! This is an easy method for getting great looking typographical pieces in your own work.

This is for those of you who want to be able to write better and more fancifully in your art works. This is the easiest method for getting professional looking handwritten fonts.

If you have any questions or requests, please leave it in the comment box below.

Go ahead... leave a comment, like and share if you enjoyed this video!


Friday 16 August 2013

Art Journal - The Ocean - Mixed Media

This has been a bit of a labour of love for me... This page took two days to complete and the video took all day to edit, render and upload!


Please get yourself a nice hot drink and enjoy... It's very family friendly.


I hope you have enjoyed my latest art journal offering, I really like the fun freedom of mixed media.

Products used:


Go ahead... leave a comment, like and share if you enjoyed this video!


Sunday 11 August 2013

Vlog and Vids

Recently I have been going through a few past-history blips. It is a difficult thing for me to talk about, to be honest my past would've made the best seller list a few years ago if I had bothered to write it all into a book. I don't know if I could though. It's really hard to understand why the hell someone would want to read about all the bad shit that happened to me as a kid, it's bloody sick really.

You know I did read one of those books, when they first became popular, I thought it was about a kid that leaves home and travels to far away lands, I didn't realise that it wasn't about that, but something completely horrific and terrifying. The book made me feel bloody awful and dragged memories up through the muck for me and it was a really crappy week after that book. I buried the emotions of those memories a long time ago, so I could have a calm and productive life. I did not want to have them dragged back up because of a poor library choice.

Anyway, it happened, and being the person I was, I couldn't just close the book half way, I had to finish. I suppose it was meant to be an uplifting tale of struggle and eventual freedom, but for me it was just miserable and depressing and brought back a lot of shit I thought had buggered off forever.

I re-repressed the emotions and they did stay buried for a while. But recently, they have been coming back at the most inappropriate times and they are causing trouble for me, both at work and at home so I needed to do something about that.

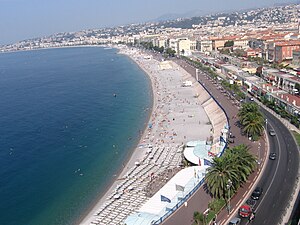
Nice, France. Nicea, Francja.
As a kid, I saw X amount of counsellors, which all pretty much sucked. These people came from well-adjusted families with plenty of money, loving parents and they went on holidays to France once a year. They had no bloody idea, no emotional connection to what I had been through, so sitting in that sweaty office, drinking warm orange squash, talking about my 'feelings' was a complete waste of time and it bored the hell out of me. I wized up pretty quickly, I gave them what they wanted to hear, played the system and when the 6 week observation was up, I was denied any more time which suited me perfectly.

Ball balance
You see, my childhood taught me to fend for myself, rely on my own judgement and wits. Not to need other people to help me. I didn't need the silly women, with their perfect hair, loving husbands and 2.4 kids. I didn't need their designer handbags to listen to my pathetic story. I didn't need their nude tights and black court shoes to hear about how I felt about XYZ. I didn't need their gold framed picture of their son holding a foot ball to see my pain, confusion and anger. These women were as emotionally involved as their possessions and they simply didn't care. I could tell that they were just earning a pay-check and the bragging rights at their cocktail parties... "I help poor children".

So as always and before I helped myself. I shut it all off, the good and the bad. I was an emotional black hole. Not happy, not sad.


I learnt to mimic the appropriate emotional responses. You  might think that I was/am a socio-path. Not true. I just blocked off my real feelings and replaced them with newer, shiner, more appropriate ones that everyone else wanted to see.

English: Common Do not disturb sign of a hotel
You must understand, my ordinary emotional responses to situations were, well, shall we say... inappropriate. Well, not inappropriate exactly, but off-kilter. These off kilter emotions disturbed people slightly, they weren't quite right, ever so slightly 'off'. I would laugh at a joke a second too early, cry a little to late. It made people uncomfortable. So I faked it.

A couple of years ago, I noticed that my fake emotions were being spotted. I don't know why this was happening but it was. I decided to stop faking it and try to go back to the real emotions. I didn't know how hard it was going to be. This time of my life was the hardest.

It took me about three to four months to stop faking. It was such a part of me that I don't think i am 100% fake free, even now.


But I managed to get everything back and I'm 'normal' again. Although bringing all of the original emotions back has caused some problems...

Namely the major problem of flipping out at innocuous gestures, looks and words. I'm coping with this. Someday it's easier than others, but I have been trying Art Therapy and it's working...


Friday 2 August 2013

Easy way to remove permanent ink or dye from your hands & skin.

Peacock
Hi friends, just a quickie today. I have been doing some more art in my journal, (take a look here for the first video) and I came across a neat solution to get rid of ink stains that will not wash off your skin.

I don't know about you, but I'm always getting permanent ink all over my skin and I really hate it. It doesn't come off with soap and water and in the past I have resorted to using sandpaper! which as we both know is bloody awful for your skin.

Anyway, I have found a truly effective and safe way to remove those annoying ink stains, watch the short video below to see what it is.


Please leave a comment below and subscribe to my YouTube channel for more videos (it's completely free!)

Friday 26 July 2013

Discarded Book becomes Funky Art Journal :: The Covers.

Hi friends, I've been looking at buying a journal recently, however they are pretty expensive for what they are, plus I just want to scribble in it really so I can't justify the expense for a scrappy thing.

I found a video on youtube while bored and browsing one day and the lady that made the video (Kirstie Sloan) inspired me to make a journal by recycling/upcycling an old kids annual book I had lying about.

This is my book... please enjoy!


Check out my Channel and Subscribe!

Tuesday 16 July 2013

At the moment...

So it has been hot. Really hot. The garden is a little wilted and the plants are struggling, I don't like to water the garden as it creates shallow root systems and therefore weak plants.

This is the garden with no water and it has been completely dry for the past three weeks with baking hot sun and a light breeze the ground is nearly cracking here in Ludlow.

I did add water to the pond, it was becoming stagnant so a couple of watering cans of rain water from the water butt helped alleviate the worst of the stagnation.

As for me, I have been a 'shade' ninja, I can spot a patch at 100 yards so I'm not terribly burnt, but even in the shade, the reflected light has caused me to go an unhealthy shade of red... ow.

Monday 1 July 2013

♣ My Very First Art Journal Page ~ Freehand ♣

I have been watching Jenniebellie's art journal flip-throughs and tutorials and she has inspired me to start my own art journal/scrapbook thing. I've already started secret journalling, it's extremely therapeutic.


Saturday 29 June 2013

Lemon balm

A year ago this was a small cutting from a friends parent plant. Just look at it now!

Wednesday 26 June 2013

Mobile Blogging.

So I have a new phone and I am very impressed by the time it takes to post on my blog. Hopefully I will be able to post more in the future on the go and with having a better camera,  I will be able to take photos on the go, rather than having to take my rather large camera around everywhere with me.

Look out for more mini blog posts from me in the near future!

Friday 21 June 2013

Comparison Review of White Pens for Scrapbooking/Journalling (UK)


As a crafter in the UK, it's hard to find card making, scrapbooking or art journalling products that I see featured on American videos and blogs, I can't just pop down to Wal-Mart or the Dollar Store, don't have them over here!

So I thought I would do a comparison review on the white pens available from the UK for the UK!

Thinking of buying a white pen? Check this vid out before splashing your cash...

I've noticed that most of the videos and comparisons of white pens for Scrapbooking, card making and Journalling are from the USA which isn't great for us British! 

I have had a bit of a white pen fetish, so therefore spent a little bit of monies on a selection of white pens and with mixed experimental results I wanted to show y'all what works, what don't and what pen really sucks for the money.

Tuesday 18 June 2013

The Toad in the Pond.

Just a quick update about the pond and how it's coming along, you remember, at the end of summer last year I pretty much broke my back digging through pure red Shropshire clay to put in a pre-fab pond my Mum had given me. Three weeks later I had already got two Frogs and a Toad in it.

Fast forward to today and I no longer have Frogs, don't know what happened to them, maybe they had an argument with the Toads or something, but I now have two Toads in the pond...


Friday 14 June 2013

The Garden : After the Storm

It rained, it poured, it pissed it down.

My god did it rain! I have never seen rain like it before, apart from a few years ago but that was the volcanoes fault and there aint been no volcano recently.

Anywho, thought you might like to see some photographs of my poor garden after the rain monsoon...


Hope you enjoyed... please leave a comment!


Thursday 6 June 2013

Shabby Chic Embellishments... With a Great Idea to use Them.

Shabby Chic Vintage Mobile
Well it's taken a couple of days but I finally got around to finishing my vintage mobile.

I had thought of this while in a lot of pain, waiting at the hospital for a doctor to have a look at my toe, turns out that dropping an iron on your toe will indeed break it.

I made a video of the process of making this mobile (not breaking my toe...) so please watch & enjoy!


Thursday 30 May 2013

Super cheap Washi Tape! :: Video

So I'm really getting into crafts and so forth, there isn't much to do in the garden at the moment, just weeding and I don't think you really want to see photographs of someone weeding...

I thought I would introduce some craftiness into the blog, as I know quite a few of you like crafts and such like, so here we go!

This a quick tutorial I did on Washi Tape, there are links below if you would like to know more about washi tape. In short, it's a paper tape with designs and colours printed on it; used to enhance and add interest to scrapbook pages and handmade cards, it can also be used for wrapping gifts and so on.

Washi tape is expensive in craft shops so make your own!


So that's the video! You don't need to buy the inks to do this, watercolour paints, felt-tip pens or even pencil crayons would work!

Give it a go and let me know what you did and what you used it for!

Leave a comment below.

Monday 27 May 2013

Dustbathing Chicken Dance

My chickens were let out for the first time this week and they have had a great time (and so have I) they have eaten all of the slugs and snails they can find and have scratched all over the bare dirt, diggin up weed seedlings - double bonus for me.

After eating and scratching they decided to have a dustbath...


Saturday 25 May 2013

Craft: Upcycle Tin Cans. Shabby Chic on the Cheap.

Time: 25mins
Skill: Easy
Cost: 20p - £2.00 (depending on if you buy the tin)
Awesome: Pretty Cool


So I got a bit bored and decided to play around. I had an old long hot dog tin from the other day's barbecue which I thought would make a good holder for my incense sticks. Problem was, it looked naff, so I took the label off and gave it a good wash.

Once dried, I spray painted inside a bit with white gloss paint just to give it a nice finish and then using superglue and jute garden twine, I went to town. The actual wrapping took about half an hour to do, mainly because I'm a bit of a perfectionist, it wouldn't take as long with a smaller can. 


My main tips from this are to use wet (not gel) superglue, that way you can simply squirt a bit onto the wrapping you have already done and it will seep through and attach the twine to the tin. I did this every inch or so of the wrapping and it's very solid.

The flower embellishment was from an old crochet doily which I gather up, tied with a short thread and cut off the excess. I used fabric glue to attach it to the twine. 


Please let me know if you would like to see a tutorial on how I made this!

AddThis

Related Posts by Zemanta